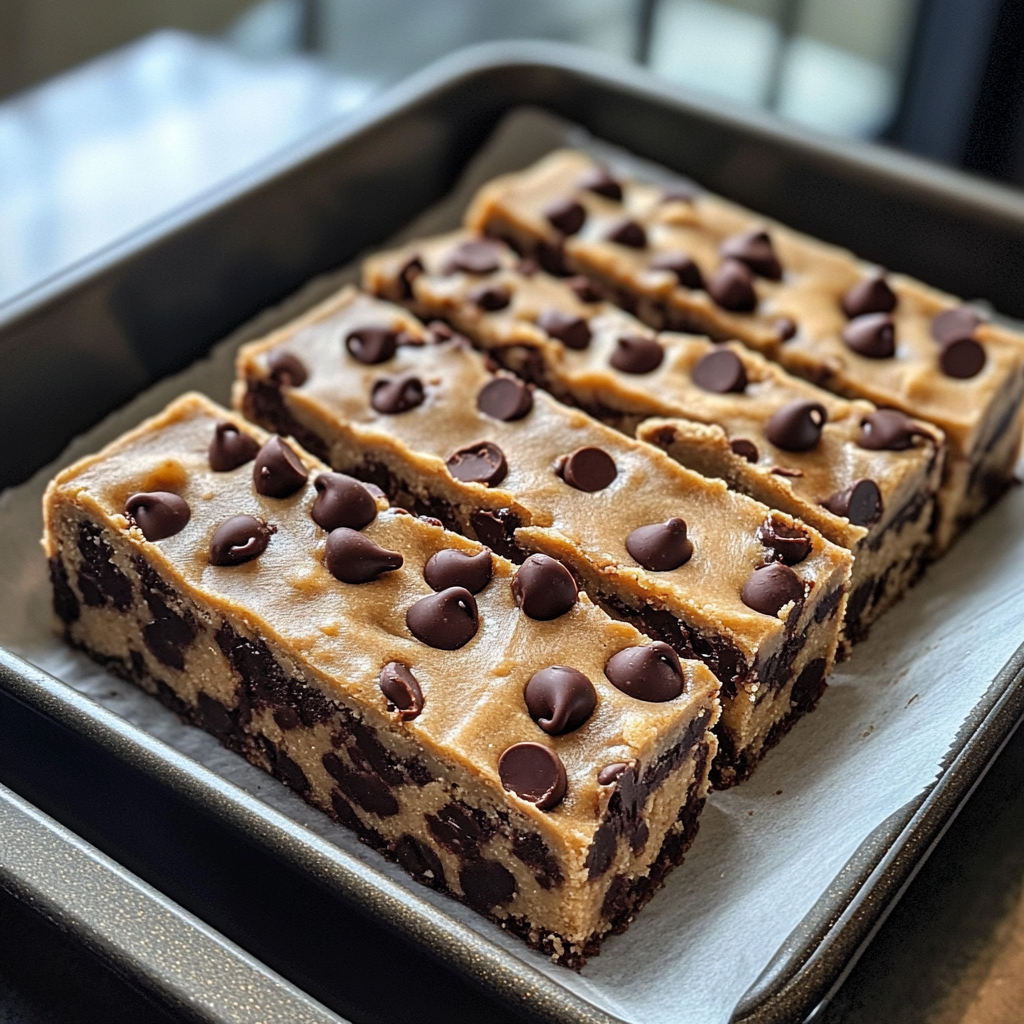
Chocolate Chip Cookie Dough Bars
If you’re craving a sweet treat that’s bursting with flavor and texture, look no further than these Chocolate Chip Cookie Dough Bars. They combine the irresistible chewiness of cookie dough with rich, gooey chocolate chips in a perfect bar form. Whether you want a quick dessert or a snack to satisfy your chocolate cravings, these bars deliver decadence in every bite with an easy-to-follow recipe anyone can master.
Why You’ll Love This Recipe
- Simple Ingredients: Uses pantry staples that are easy to find and mix.
- Chewy & Gooey Texture: Offers the perfect balance of soft cookie dough and melty chocolate chips.
- Quick Prep Time: Ready to bake in under 15 minutes for instant gratification.
- Versatile Snack: Great for lunchboxes, parties, or a homemade gift.
- No Baking Required (Optional): Can be adapted for a no-bake version with a few tweaks.
Ingredients You’ll Need
This recipe keeps things wonderfully straightforward. Each ingredient plays an essential role to build that iconic cookie dough flavor while ensuring the bars hold together nicely and look irresistible.
- All-Purpose Flour: Provides structure and the familiar cookie dough consistency.
- Unsalted Butter: Adds richness and moisture for chewy bars.
- Brown Sugar: Brings a deep caramel flavor and helps with softness.
- Granulated Sugar: Balances sweetness and contributes to the texture.
- Vanilla Extract: Enhances the overall flavor with warm, aromatic notes.
- Salt: Amplifies sweetness and balances flavors beautifully.
- Mini Chocolate Chips: These melt perfectly and ensure every bite has gooey chocolate.
- Milk (Optional): Adds moisture if the dough feels too thick or dry to handle.
- Egg Substitute (Optional): For those avoiding eggs, use flax or chia seeds mixed with water for binding.
Variations for Chocolate Chip Cookie Dough Bars
Feel free to personalize your bars! This recipe adapts easily to your preferences or dietary needs without losing that delicious cookie dough magic.
- Nutty Twist: Add chopped walnuts or pecans for added crunch and flavor.
- Peanut Butter Swirl: Mix in creamy peanut butter for a decadent twist on classic cookie dough.
- Gluten-Free Version: Use a gluten-free flour blend to keep the bars chewy and tasty.
- Dairy-Free Adaptation: Substitute butter with coconut oil and use dairy-free chocolate chips.
- Salted Caramel Drizzle: Top the bars with a homemade salted caramel sauce for extra indulgence.

How to Make Chocolate Chip Cookie Dough Bars
Step 1: Prepare Your Ingredients
Start by gathering and measuring all your ingredients since this recipe comes together quickly. Soften the butter to room temperature to ease mixing and let the brown sugar clumps break apart for an even dough.
Step 2: Cream the Butter and Sugars
In a large mixing bowl, beat the softened butter with brown and granulated sugars until the mixture looks light and fluffy. This step incorporates air, giving your bars a soft texture.
Step 3: Add Vanilla and Mix In Dry Ingredients
Stir in the vanilla extract, then gradually add the flour and salt. Mix just until combined to avoid overworking the dough, which can make the bars tough.
Step 4: Fold in Chocolate Chips
Gently fold in the mini chocolate chips, ensuring they’re evenly distributed but not crushed, keeping pockets of melted chocolate in each bar.
Step 5: Press Dough into Pan
Line a square baking pan with parchment paper and press the dough evenly into the bottom, smoothing the top with a spatula or your hands for uniform thickness.
Step 6: Chill or Bake According to Preference
For a no-bake option, chill the bars in the refrigerator for at least two hours until firm. Otherwise, bake at 350°F (175°C) for about 20 minutes or until edges turn golden brown.
Step 7: Cool and Cut
Allow the bars to cool completely in the pan before lifting out using the parchment paper. Cut into squares for the perfect hand-held treat.
Pro Tips for Making Chocolate Chip Cookie Dough Bars
- Use Room Temperature Butter: Ensures smooth mixing and a fluffy texture.
- Don’t Overmix: Keeps bars tender and prevents them from becoming dense.
- Mini Chocolate Chips: Melt more evenly and disperse better than large chips.
- Chill Before Cutting: Keeps the bars from crumbling or sticking together.
- Line Your Pan: Parchment paper makes cleanup a breeze and helps remove bars intact.
How to Serve Chocolate Chip Cookie Dough Bars
Garnishes
Sprinkle a few extra mini chocolate chips on top after baking for a pretty presentation. Dust with powdered sugar or drizzle melted chocolate for an elegant touch.
Side Dishes
Pair with a glass of cold milk, a scoop of vanilla ice cream, or fresh berries to balance the richness and elevate the experience.
Creative Ways to Present
Cut bars into bite-sized squares or triangles for easy sharing at parties. Wrap individual bars in wax paper tied with twine to make charming homemade gifts.
Make Ahead and Storage
Storing Leftovers
Keep leftover bars in an airtight container at room temperature for up to three days or refrigerate for up to a week to retain freshness and chewiness.
Freezing
Wrap bars tightly in plastic wrap and store them in a freezer-safe container for up to three months. Thaw at room temperature before serving.
Reheating
Warm bars for a few seconds in the microwave if you want gooey chocolate chips and a soft, fresh-from-the-oven feel. Avoid overheating to prevent drying out.
FAQs
Can I make these bars without eggs?
Absolutely! You can substitute eggs with flaxseed or chia seed mixed with water, which acts as a binder and keeps the dough together well.
Are these bars gluten-free?
Not in the traditional recipe, but swapping all-purpose flour with a gluten-free flour blend will make these gluten-free and just as delicious.
Can I use regular-sized chocolate chips?
You can, but mini chocolate chips melt more evenly and distribute better throughout the bars, creating a superior texture.
Do I have to bake these bars?
No. For a no-bake version, simply chill the dough in the refrigerator until firm. Baking gives a more classic cookie bar texture but both ways are tasty.
How long do Chocolate Chip Cookie Dough Bars last?
Stored properly at room temperature, they last about three days. Refrigeration extends freshness to a week, making them perfect for storing ahead.
Final Thoughts
These Chocolate Chip Cookie Dough Bars are truly a delightful treat that’s easy to make and hard to resist. Perfect for sharing or keeping all to yourself, they bring the nostalgic joy of cookie dough and chocolate into a perfect handheld dessert. Give this recipe a try and watch these bars quickly become one of your favorite sweet snacks!
Related Posts
PrintChocolate Chip Cookie Dough Bars

Chocolate Chip Cookie Dough Bars offer a perfect blend of chewy cookie dough texture and gooey melted mini chocolate chips in a convenient bar form. Easy to prepare with simple pantry ingredients, these bars can be baked or enjoyed as a no-bake treat, making them perfect for snacks, desserts, or gifting.
- Prep Time: 15 minutes
- Cook Time: 20 minutes (optional, if baking)
- Total Time: 35 minutes (includes baking; no-bake requires 2 hours chilling)
- Yield: 16 bars 1x
- Category: Desserts
- Method: Baking / No-Bake
- Cuisine: American
- Diet: Can be adapted to Gluten Free or Dairy Free
Ingredients
Main Ingredients
- 1 cup All-Purpose Flour
- 1/2 cup Unsalted Butter, softened to room temperature
- 1/2 cup Brown Sugar, packed
- 1/4 cup Granulated Sugar
- 1 teaspoon Vanilla Extract
- 1/4 teaspoon Salt
- 3/4 cup Mini Chocolate Chips
Optional Ingredients
- 1–2 tablespoons Milk (if dough is too thick or dry)
- Egg Substitute (e.g., 1 tablespoon ground flaxseed or chia seeds mixed with 3 tablespoons water)
Instructions
- Prepare Your Ingredients: Gather and measure all ingredients. Soften the butter to room temperature and break apart any brown sugar clumps to ensure even mixing.
- Cream the Butter and Sugars: In a large mixing bowl, beat the softened butter with brown sugar and granulated sugar until the mixture is light, fluffy, and incorporates air, giving the bars a soft texture.
- Add Vanilla and Mix In Dry Ingredients: Stir in the vanilla extract. Gradually add the all-purpose flour and salt, mixing just until combined to avoid overworking the dough, which can lead to tough bars.
- Fold in Chocolate Chips: Gently fold in the mini chocolate chips, ensuring they are evenly distributed but remain intact to create pockets of melted chocolate.
- Press Dough into Pan: Line a square baking pan with parchment paper. Press the cookie dough evenly into the bottom of the pan, smoothing the surface with a spatula or your hands to create uniform thickness.
- Chill or Bake According to Preference: For a no-bake version, chill the pan in the refrigerator for at least two hours until firm. To bake, preheat oven to 350°F (175°C) and bake for about 20 minutes or until the edges turn golden brown.
- Cool and Cut: Allow the bars to cool completely in the pan before lifting them out using the parchment paper. Cut into squares and serve.
Notes
- Use room temperature butter for smooth mixing and fluffy texture.
- Do not overmix the dough to keep bars tender and avoid density.
- Mini chocolate chips melt evenly and disperse better than larger chips.
- Chill bars before cutting to prevent crumbling and sticking.
- Line your baking pan with parchment paper for easy cleanup and to remove bars intact.
Nutrition
- Serving Size: 1 bar (approximate)
- Calories: 180
- Sugar: 14g
- Sodium: 85mg
- Fat: 9g
- Saturated Fat: 5g
- Unsaturated Fat: 3g
- Trans Fat: 0g
- Carbohydrates: 22g
- Fiber: 1g
- Protein: 2g
- Cholesterol: 15mg
Keywords: chocolate chip cookie dough bars, no bake cookie dough bars, chewy cookie bars, easy dessert bars, gluten free cookie bars